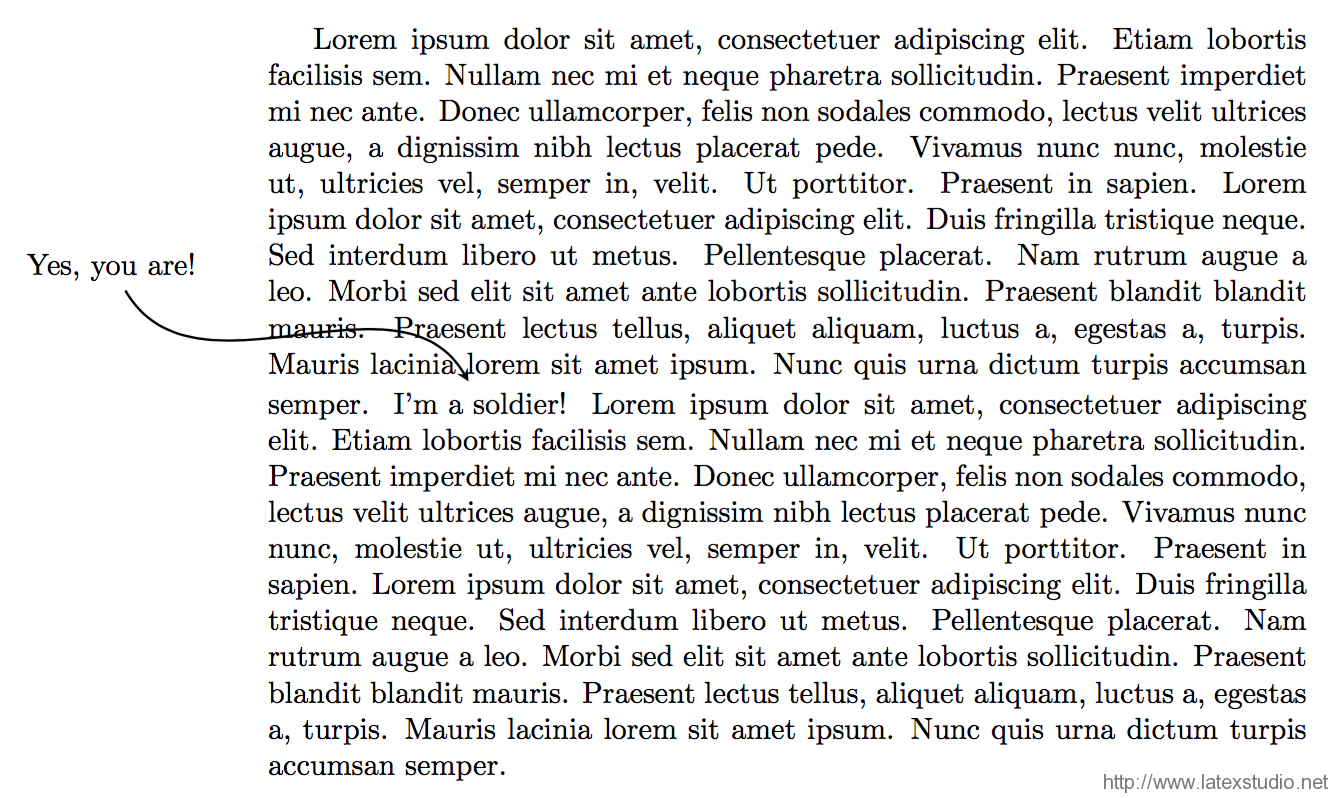
有时候,我们需要对文中的内容做进一步的解释;有时候,我们会想在文章边注的区域内,给特定的内容加上一个俏皮话(如下图)。 这篇文章,我们将用 TikZ 实现这个效果。
TikZ 的知识
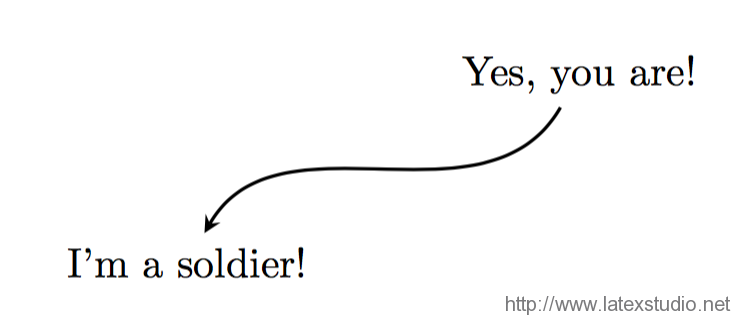
我们知道,在tikzpicture 环境中,类似上面的效果,很容易就能实现。
\documentclass{article}
\usepackage{tikz}
\usetikzlibrary{positioning}
\tikzset{>=stealth}
\begin{document}
\begin{tikzpicture}[node distance = 1.5cm]
    \node (test) {I'm a soldier!};
    \node (testDesc) [above right = of test] {Yes, you are!};
    \draw [->,thick] (testDesc) to [in = 60, out = -120] (test);
\end{tikzpicture}
\end{document}
 在这里,我们引入了
 tikz 宏包,以及它的 positioning 库,用来绘制和定位 nodes。在 tikzpicture中,我们建立了两个 node: test 和 testDesc,后者的位于前者的右上方。最后,我们用绘制了从 testDesc 到 test 的曲线箭头,其样式由之前的 \tikzset{>=stealth} 指定。
这是 TikZ 的基本应用,不必多言。然而我们的需求,是将位于正文中的文字(它应该是一个 node)和正文外 tikzpicture 中的 node 连起来。如果能解决这一点,那么我们就能将未知问题转换为已知问题。
我们从 TeX 的执行过程和 TikZ 出发,思考一下,为了解决这个问题,需要如何操作。首先,我们需要记录 test和 testDesc 的位置。由于我们不可能将这个位置信息直接写入输出的 PDF 文件中,所以我们需要将它写入辅助文件中。这意味着,为了正确实现我们需要的效果,我们至少应该编译两次源文件。其次,对于连接 test 和testDesc 的箭头来说,它的边界(bounding box)需要特别处理——如果按照正常的方式处理,那么箭头和正文部分就不能重叠。
所幸,TikZ 已经为我们做好了这些工作。我们需要它提供的 remember picture 和 overlay 连个选项。它们的作用是:
remember picture: 将位置信息写入辅助文件,供后续使用;overlay: 不计算边界,允许与其它内容重叠。
实际实现看看
首先,我们来实现test 的部分。这部分比较通用,本质上就是用 TikZ 给几个单词打上 node 标记的过程。于是我们可以定义一个命令
\newcommand{\tikzmark}[3][]
  {\tikz[remember picture, baseline]
    \node [anchor=base,#1](#2) {#3};}
注意,这里我们用了 remember picture 选项,确保 \tikzmark 的位置会被保存下来。之后,在写注释的时候,就可以引用 \tikzmark 的位置了。这里有一个简单的实现
\documentclass{article}
\usepackage{tikz}
\usetikzlibrary{positioning}
\tikzset{>=stealth}

\newcommand{\tikzmark}[3][]
  {\tikz[remember picture, baseline]
    \node [anchor=base,#1](#2) {#3};}

\usepackage{mwe}
\begin{document}
\blindtext
\tikzmark{test}{I'm a soldier!}
\blindtext

\begin{tikzpicture}[overlay, remember picture, node distance = 1.5cm]
    \node (testDesc) [above left = of test, xshift = -1cm] {Yes, you are!};
    \draw [->,thick] (testDesc) to [in = 120, out = -60] (test);
\end{tikzpicture}
\end{document}
在写注释的时候,我们给 tikzpicture 环境加上了 overlay 选项。这是因为从 testDesc 到 test 的箭头应该可以与其它正文重叠。这段代码的效果,就是文章开头的那个样子。
还能用在数学公式里?
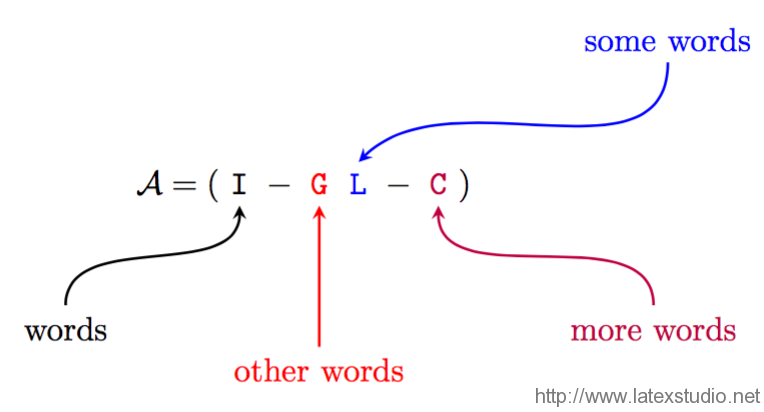
是的,\tikzmark 也可以写在数学公式里。
\documentclass{article}
\usepackage{amsmath}
\usepackage{tikz}
\usetikzlibrary{positioning}
\tikzset{>=stealth}

\newcommand{\tikzmark}[3][]
  {\tikz[remember picture, baseline]
    \node [anchor=base,#1](#2) {#3};}

\begin{document}
\[
    \mathcal{A} = (\tikzmark{identity}{\texttt{I}} -\tikzmark[red]{G}{\texttt{G}}
    \tikzmark[blue]{L}{\texttt{L}} - \tikzmark[purple]{C}{\texttt{C }})
\]
\begin{tikzpicture}[overlay, remember picture,node distance =1.5cm]
    \node (identitydescr) [below left=of identity ]{words};
    \draw[,->,thick] (identitydescr) to [in=-90,out=90] (identity);
    \node[red] (Gdescr) [below =of G]{other words};
    \draw[red,->,thick] (Gdescr) to [in=-90,out=90] (G);
    \node[blue,xshift=1cm] (Ldescr) [above right =of L]{some words};
    \draw[blue,->,thick] (Ldescr) to [in=45,out=-90] (L.north);
    \node[purple] (Cdescr) [below right =of C]{more words};
    \draw[purple,->,thick] (Cdescr) to [in=-90,out=90] (C.south);
\end{tikzpicture}
\end{document}
你可以试着编译上面的代码,将得到以下效果
 选自:http://liam0205.me/2016/09/24/TikZ-comment-to-text/


发表评论 取消回复